1、环境:
win7、VMware 10、ubuntu 12.04
虚拟机上操作系统详细信息如下:
root@ubuntu:/etc/init.d# uname -a
Linux ubuntu 3.2.0-23-generic-pae #36-Ubuntu SMP Tue Apr 10 22:19:09 UTC 2012 i686 i686 i386 GNU/Linux
2、启动ssh服务
2.1 安装ssh服务
Ubuntu提供了便利的apt工具,采用在线安装依赖包将会自动下载并安装。
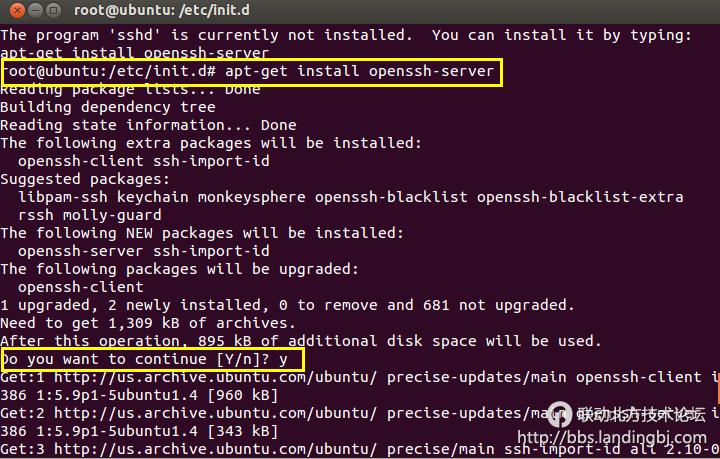
以root用户登录,执行 apt-get install openssh-server
或者 其他用户 执行 sudo apt-get install openssh-server
2.2 启动和停止ssh服务
cd /etc/init.d
//启动ssh服务
service ssh start
//停止ssh服务
service ssh stop
//重启ssh服务
service ssh restart
2.3 查看ssh服务是否启动
如果有sshd服务说明ssh server已经启动,也可以直接start(别restart,这是重启),如果已经启动会提示。
查看服务进程 ps -d grep ssh 或者 pidof sshd

2.4 高级技巧
openssh-server安装后剩下的工作就是配置,配置信息位于sshd_config文件,一行一个配置,#开头的行表示注释。配置内容 key=value形式出现。
# Package generated configuration file
# See the sshd_config(5) manpage for details
# What ports, IPs and protocols we listen for
#监听端口,可以修改为其他端口默认22
Port 22
# Use these options to restrict which interfaces/protocols sshd will bind to
#ListenAddress ::
#监听IP,去掉注释标示监听所有ip地址
#ListenAddress 0.0.0.0
#协议版本号
Protocol 2
# HostKeys for protocol version 2
HostKey /etc/ssh/ssh_host_rsa_key
HostKey /etc/ssh/ssh_host_dsa_key
HostKey /etc/ssh/ssh_host_ecdsa_key
#Privilege Separation is turned on for security
UsePrivilegeSeparation yes
# Lifetime and size of ephemeral version 1 server key
KeyRegenerationInterval 3600
ServerKeyBits 768
# Logging
SyslogFacility AUTH
#ssh登陆日志写入AUTH系统日志设备,建议级别:VERBOSE
LogLevel INFO
# Authentication:
#连接ubuntu120秒内登陆ssh,否则断开。
LoginGraceTime 120
#是否允许root登陆ssh,如果设置可能su root失败
PermitRootLogin yes
#设置SSH在接收登录请求之前是否检查用户家目录和rhosts文件的权限和所有权。防止目录和文件设置成任何人都有写权限
StrictModes yes
RSAAuthentication yes
PubkeyAuthentication yes
#AuthorizedKeysFile%h/.ssh/authorized_keys
# Don't read the user's ~/.rhosts and ~/.shosts files
IgnoreRhosts yes
# For this to work you will also need host keys in /etc/ssh_known_hosts
RhostsRSAAuthentication no
# similar for protocol version 2
HostbasedAuthentication no
# Uncomment if you don't trust ~/.ssh/known_hosts for RhostsRSAAuthentication
#IgnoreUserKnownHosts yes
# To enable empty passwords, change to yes (NOT RECOMMENDED)
PermitEmptyPasswords no
# Change to yes to enable challenge-response passwords (beware issues with
# some PAM modules and threads)
ChallengeResponseAuthentication no
# Change to no to disable tunnelled clear text passwords
#PasswordAuthentication yes
# Kerberos options
#KerberosAuthentication no
#KerberosGetAFSToken no
#KerberosOrLocalPasswd yes
#KerberosTicketCleanup yes
# GSSAPI options
#GSSAPIAuthentication no
#GSSAPICleanupCredentials yes
X11Forwarding yes
X11DisplayOffset 10
PrintMotd no
#设置是否打印最用户最后一次登陆时间。例如:Last login: Tue May 17 13:58:15 2011 from localhost
PrintLastLog yes
#是否发送心跳包
TCPKeepAlive yes
#UseLogin no
#MaxStartups 10:30:60
#激活警示条,警示未经许可用户登陆
#Banner /etc/issue.net
# Allow client to pass locale environment variables
AcceptEnv LANG LC_*
#配置外部子系统,参数为子系统名字、执行命令
Subsystem sftp /usr/lib/openssh/sftp-server
# Set this to 'yes' to enable PAM authentication, account processing,
# and session processing. If this is enabled, PAM authentication will
# be allowed through the ChallengeResponseAuthentication and
# PasswordAuthentication. Depending on your PAM configuration,
# PAM authentication via ChallengeResponseAuthentication may bypass
# the setting of "PermitRootLogin without-password".
# If you just want the PAM account and session checks to run without
# PAM authentication, then enable this but set PasswordAuthentication
# and ChallengeResponseAuthentication to 'no'.
UsePAM yes
3、使用Xshell 连接linux
查看linux系统ip
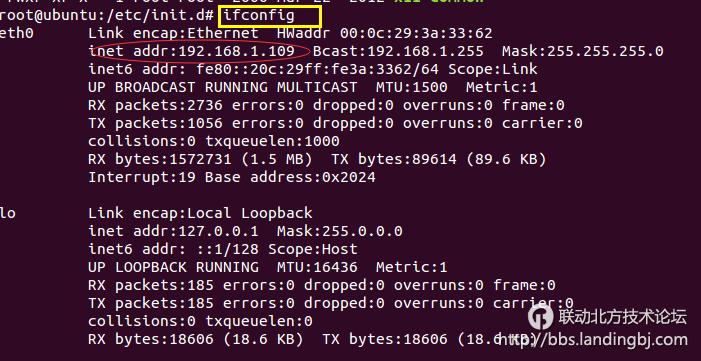
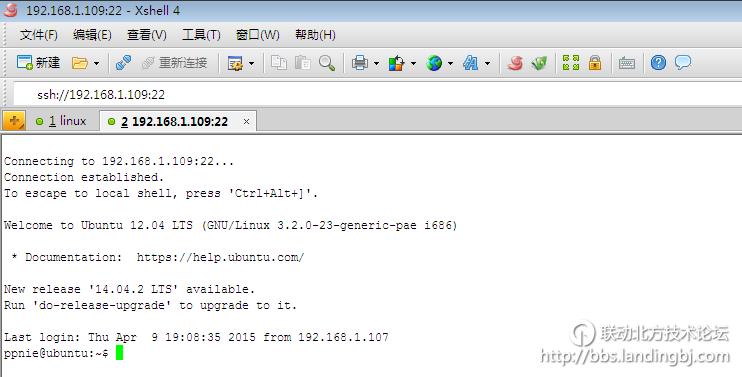
3.1 直接在地址栏输入linux系统的ip,按Enter,输入用户名和密码,确定即可连接
显示地址栏,【查看】-> 【工具栏】 -> 勾选【地址栏】

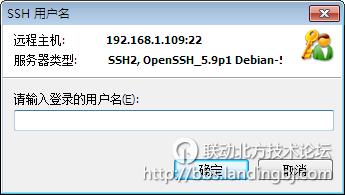
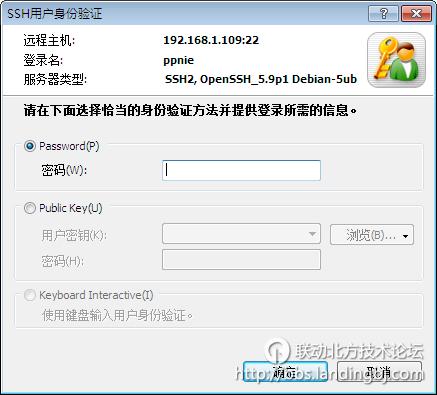
3.2 新建会话连接
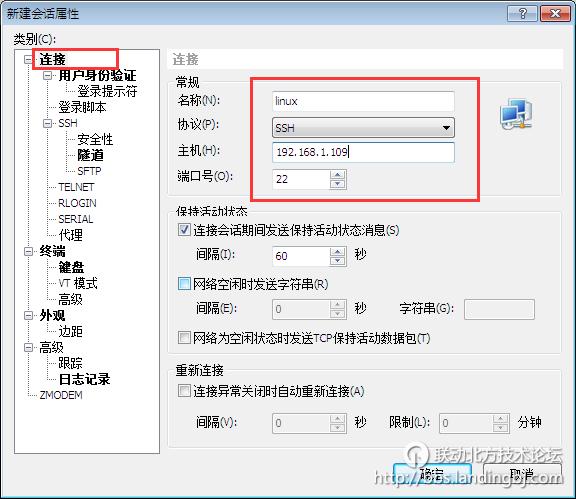
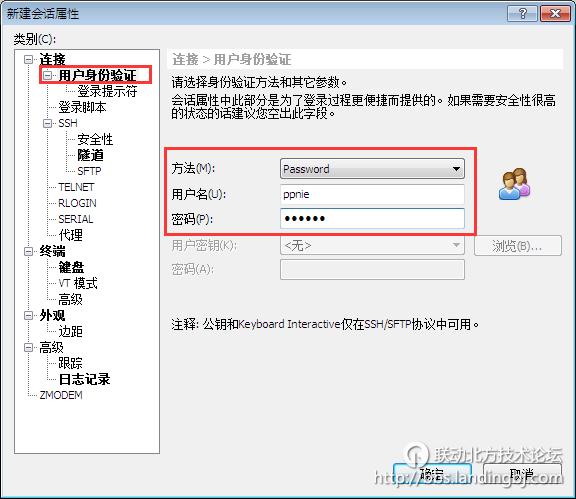
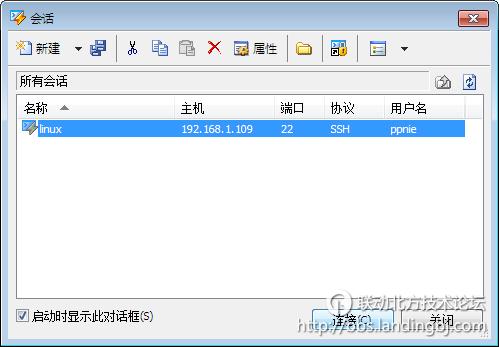
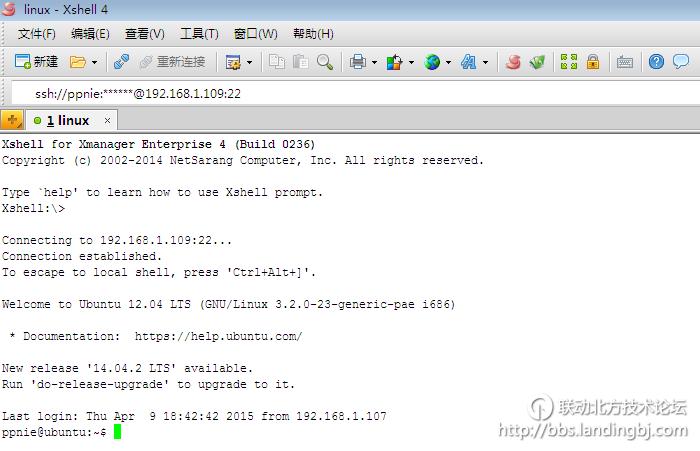
至此,xshell 则正常连接了vmware中的虚拟机了


 技术讨论
技术讨论